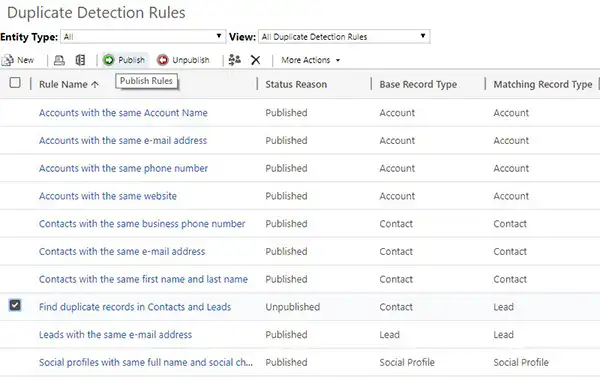
Duplicate records or data are one of the main causes of Poor data quality in a CRM database. In Microsoft Dynamics 365 You can ‘keep your data clean’ by detecting duplicates. You can create and enable duplicate detection rules to detect or prevent duplicate records.
For example, when you create a new contact in Dynamics 365, the system checks in the background to see if that contact already exists in the database. It does this by comparing record fields such as name and email address. If they match, you’ll receive a warning and can choose to delete the duplicate record or merge the two records.
By default, Microsoft Dynamics 365 includes simple duplicate detection rules for record types accounts (companies and organizations), contacts (contacts) and leads (potential customers). Of course, you can also create new rules for other record types.
- How do you enable an existing duplicate detection rule?
- How do you enable a new duplicate detection rule?
How do you enable an existing duplicate detection rule?
For example, when importing a database of contacts, you want to avoid creating duplicate contacts in your CRM database. You can enable a duplicate detection rule by comparing the email addresses of existing records with those of the new, imported records.
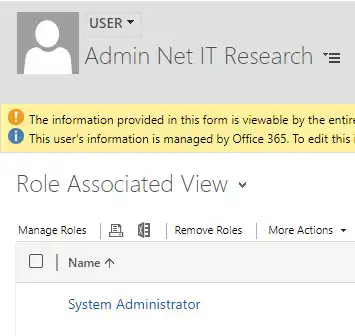
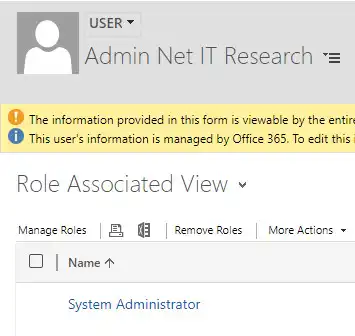
Step 1: First, check your role in Microsoft Dynamics 365. If you do not have the correct role or permission, please contact your system administrator.
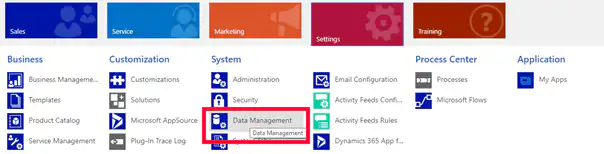
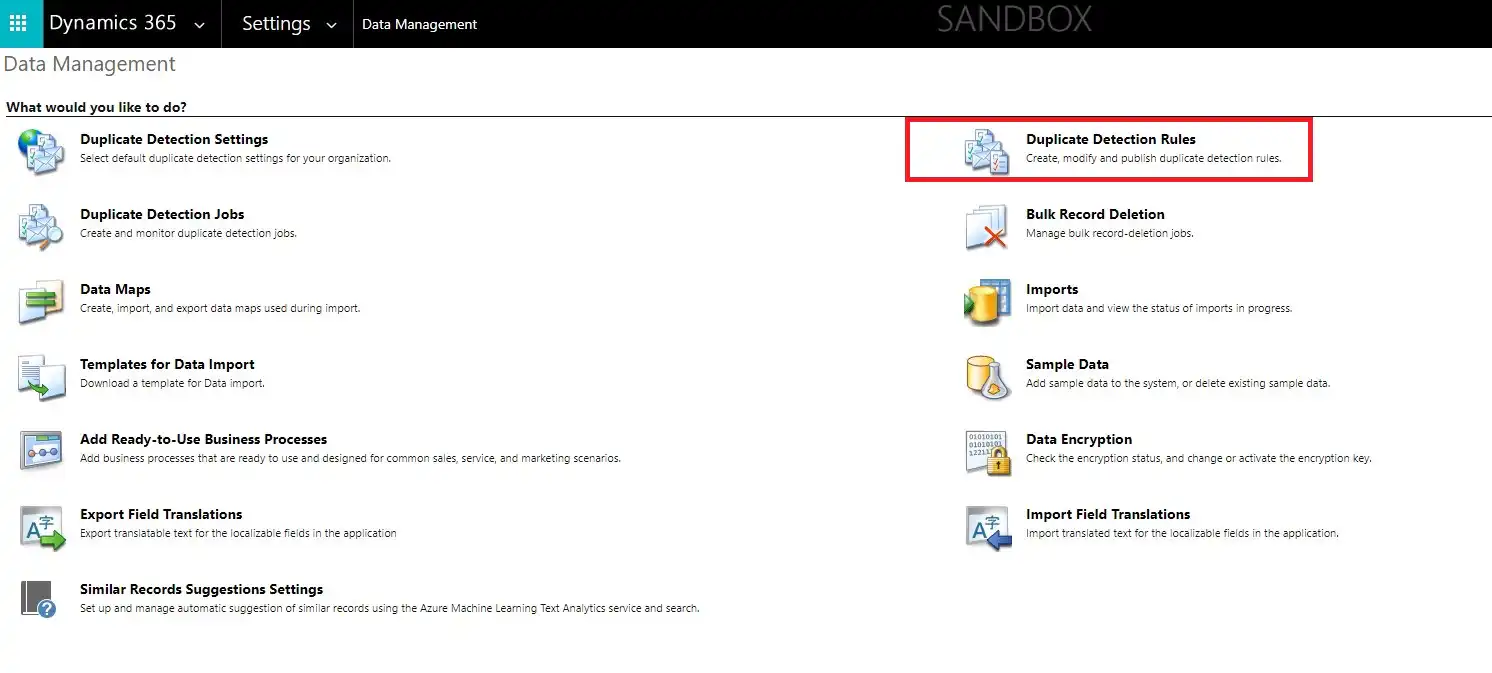
Step 2: Go to Settings > Data Management.
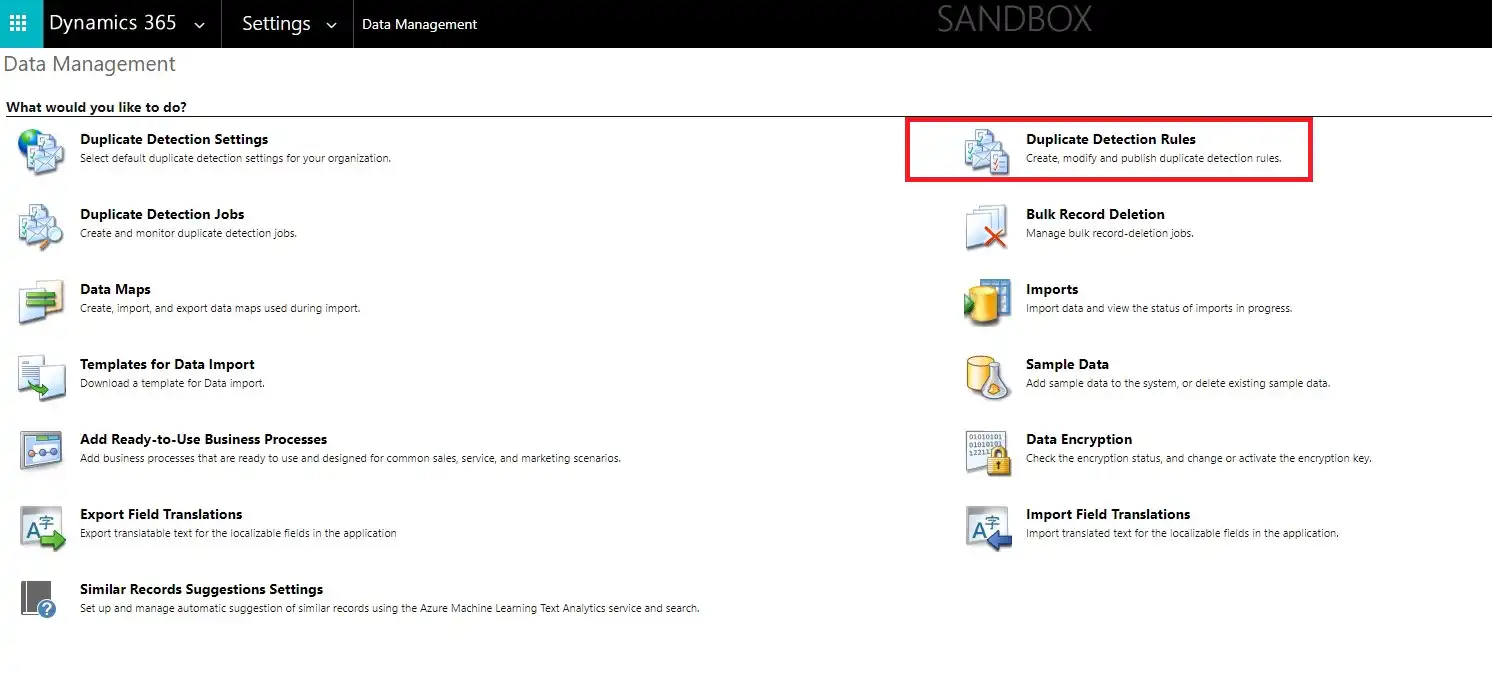
Step 3: select Duplicate Detection Rules
Step 4: Double-click an existing duplicate detection rule, for example Contacts with the same email address.
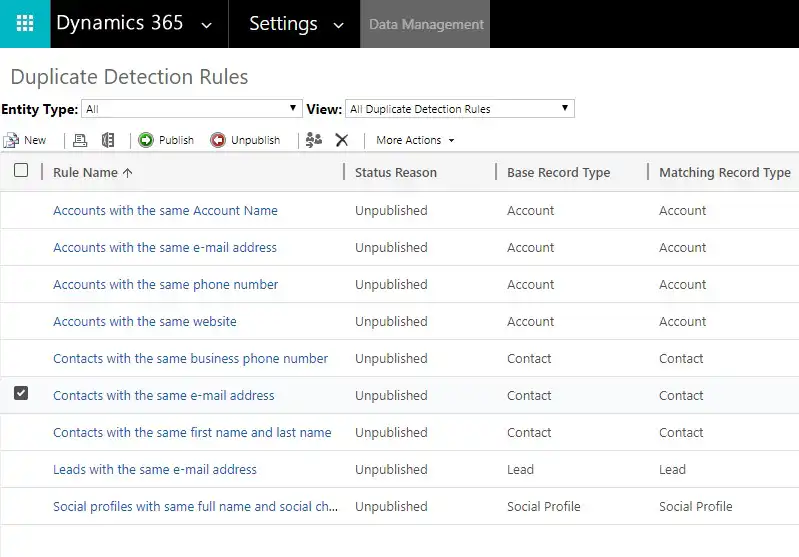
You will then see the screen shown below.
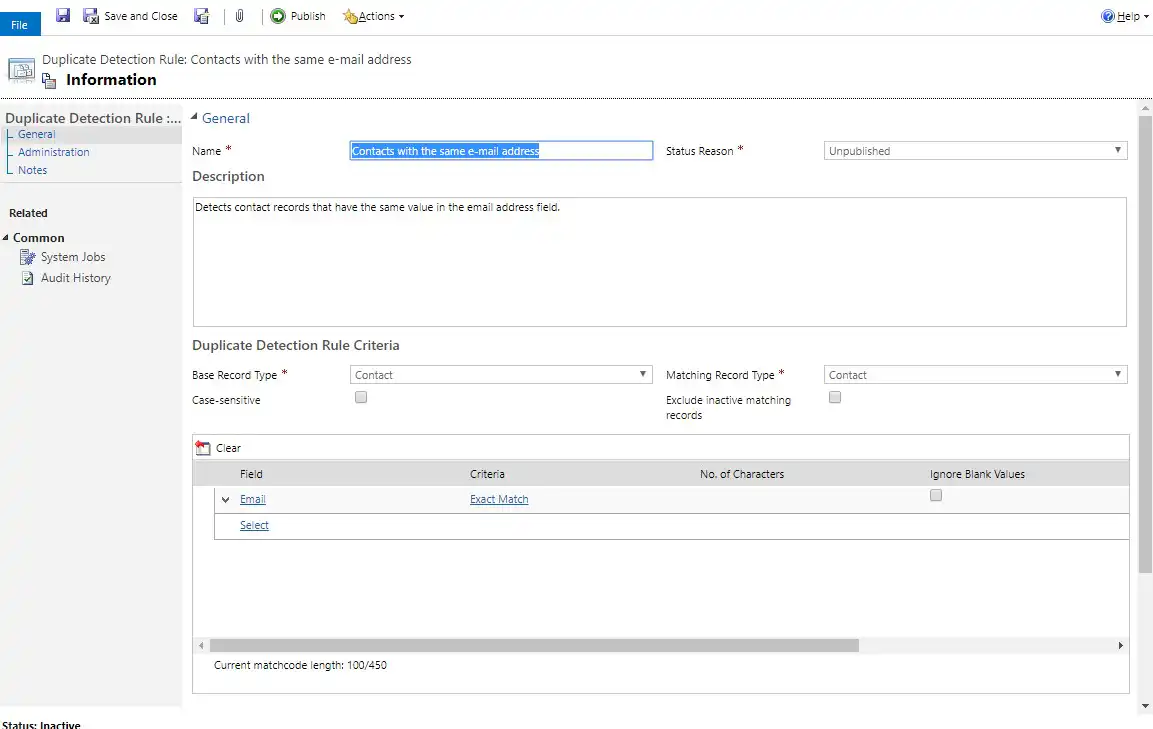
Step 5: check the box Case-sensitive if you want to make the duplicate detection rule case-sensitive.

Step 6: check the box Exclude inactive matching records Select this option if you want the duplicate detection rule to consider only active records.

Step 7: Click on Save and Close > Publish.

How do you enable a new duplicate detection rule?
For example, when creating a contact (contact record), you want to make sure that it doesn't already exist as a lead record. You can do this by comparing email addresses.
Step 1: First, check your role within Microsoft Dynamics 365. Only a system administrator or system customizer can enable or disable these rules. If you do not have the appropriate role or permission, it is best to contact your system administrator.
Step 2: Go to Settings > Data Management.
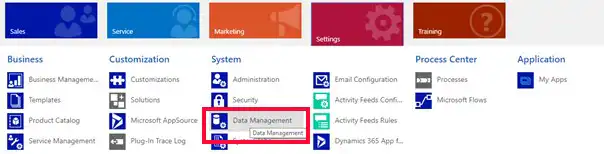
Step 3: Select "Duplicate Detection Rules" > Click New.
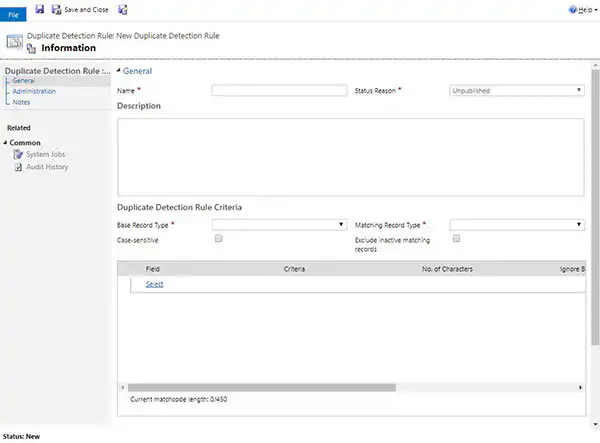
You will then see the screen shown below.
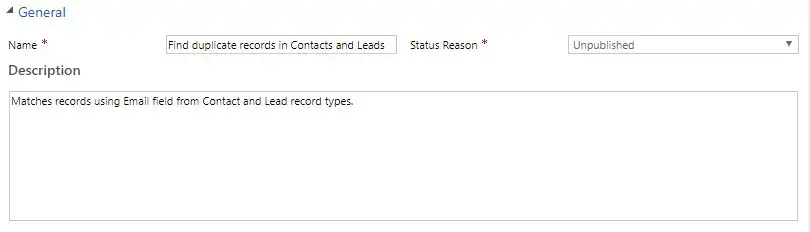
Step 4: give a name (Name) and add a Description .
Step 5: Select from Duplicate Detection Rule Criteria > Base Record Type, the record type to which the rule applies, such as Contact.

Step 6: Select from Matching Record Type, the record type to compare, for example Lead.

Step 7: check the box Case-sensitive if you want to make the duplicate detection rule case-sensitive.

Step 8: check the box Exclude inactive matching records Select this option if you want the duplicate detection rule to consider only active records.

Step 9: Next, you must specify the record fields at Base Record Field and Matching Record Field so that the duplicate detection rule knows which fields to compare. In this example, you should choose to compare the email addresses.

Step 10: Click on Save and Close

Step 11: Next, you'll see the screen with all the duplicate detection rules again > Select the rule you just created.