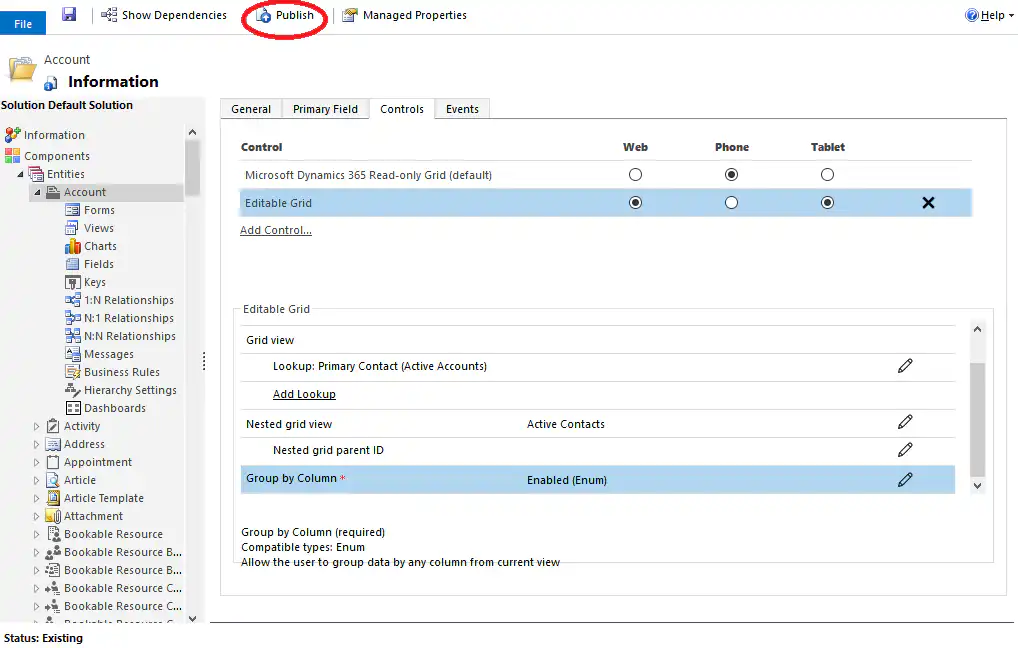
Editable Grid or Customizable View is one of the newer standard features in Microsoft Dynamics 365. This new feature has been available since the Microsoft Dynamics 365 release yourself. With ‘Editable Grid,’ you can quickly edit data within Microsoft Dynamics 365.
What is the Editable Grid feature?
A ‘Grid’ or a ‘Display’ In Microsoft Dynamics 365, a view consists of a list of records for a specific ‘entity.’ Previously, a view within Microsoft Dynamics 365 / CRM read-only. This meant that you could not edit the data within this view. For example, if you wanted to edit the company name (‘Account Name’) or the contact person (‘Primary Contact’) for specific records in the view, you had to open the individual records one by one, make the changes, and then save them. Alternatively, you could edit the records ‘in bulk’ (by selecting the rows to be edited), but this method also had many limitations.
As a result, updating data was often very time-consuming. There was therefore significant demand from Microsoft Dynamics users to find a user-friendly solution for this. With Editable Grid, Microsoft makes it possible to to quickly adjust data within a view and easily edit records.
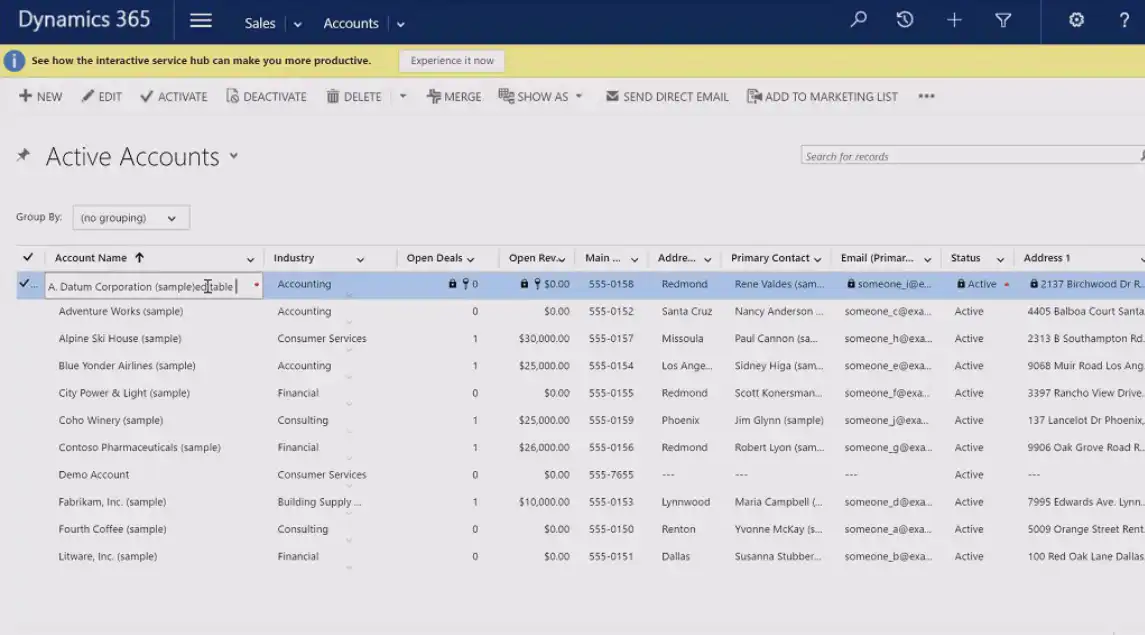
What are the capabilities of the Editable Grid feature?
The key features of the Editable Grid functionality are:
- Modifying and editing data in a record inline
- Sorting, Grouping, and Filtering Columns
- Move columns or adjust column width
- Support for the ‘look-up’ field type
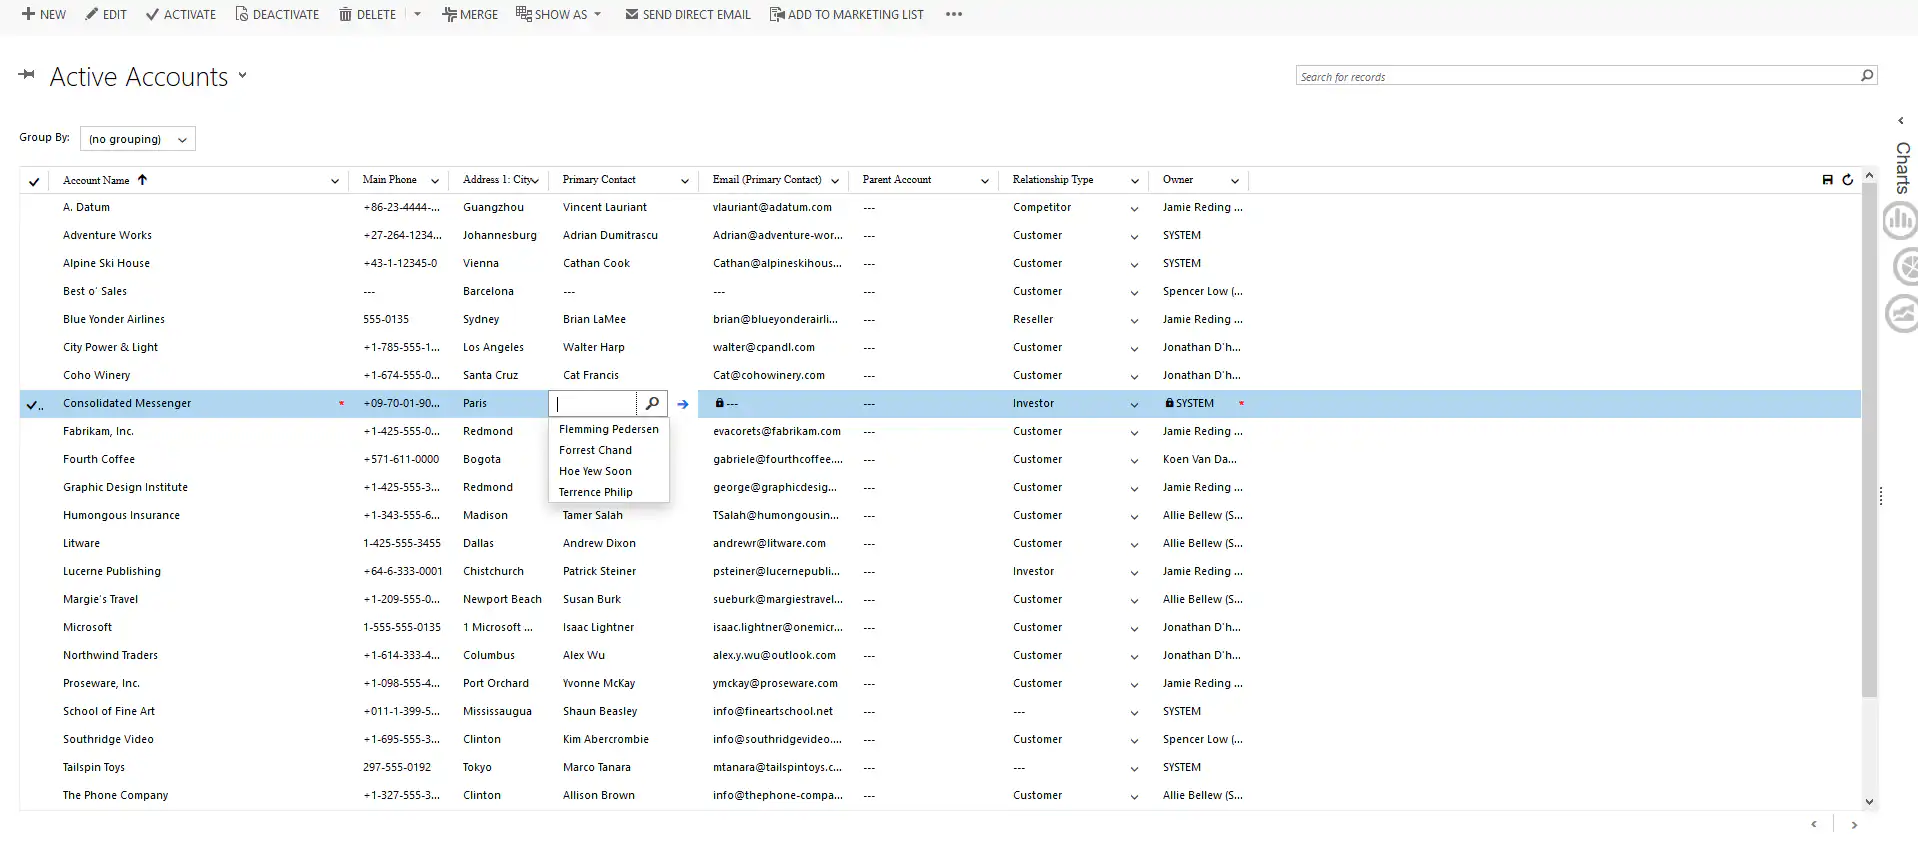
- Support for hierarchical views (for example, views of parent and subsidiary companies)
- Based on security roles, you can control what can and cannot be modified within the view
The Editable Grid feature is available for both the web and mobile devices.
How do you enable the ‘Editable Grid’?
If you want to use the Editable Grid feature for a specific entity, you must enable and configure it. The Editable Grid can be enabled and configured for both general views (such as ‘Active Accounts,’ ‘My Active Accounts,’ etc.) and subviews (for example, the contacts subview on an account form).
Below, we explain how to:
- enables the Editable Grid for a general view
- Enables the Editable Grid for a subview
- Configure the editable grid
1. How do you enable the Editable Grid for a general view?
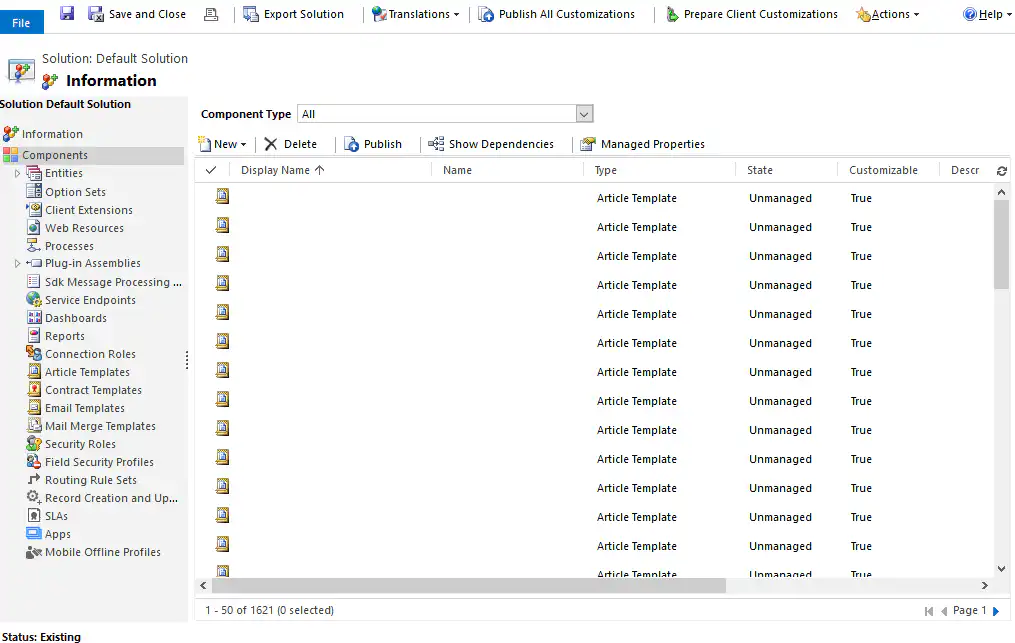
Step 1: Go to ‘Settings’ –> Navigate to ‘Customizations’ –> Click ‘Customize the System.’.
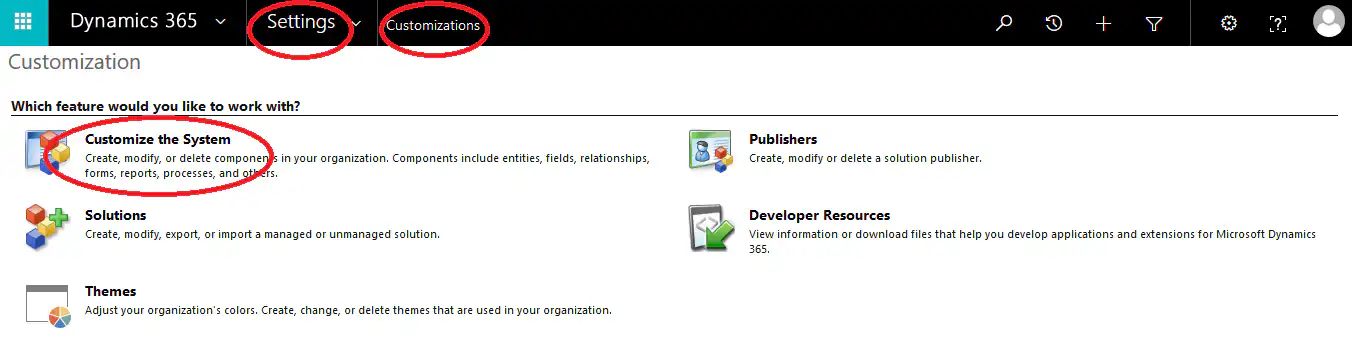
You will then see a new screen.
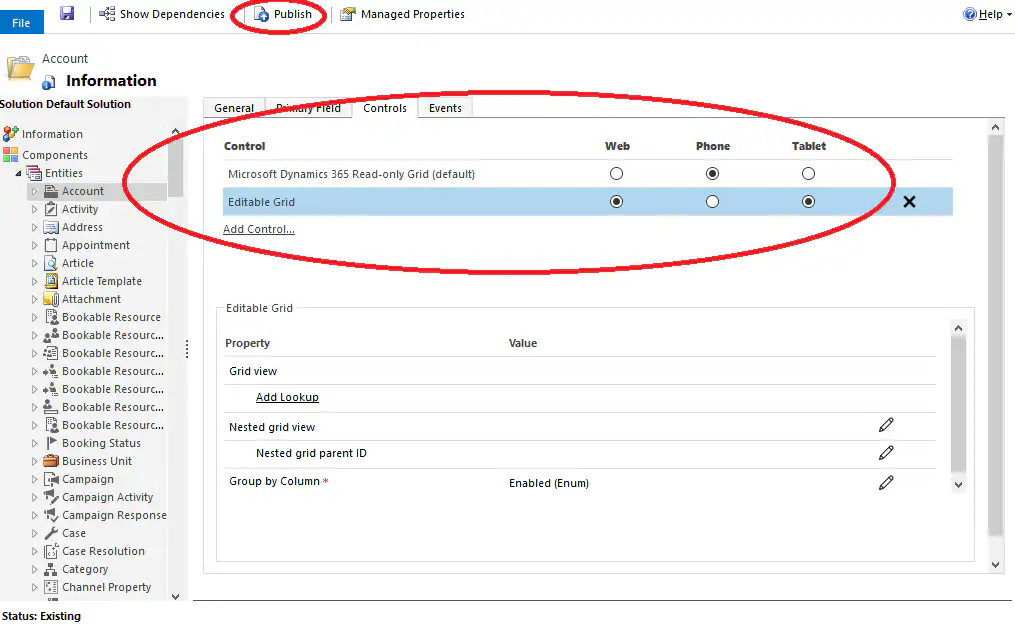
Step 2: On the new screen, go to ‘Entities’ and select the entity for which you want to enable the Editable Grid—for example, the ‘Account’ entity. Then click the ‘Controls’ tab.
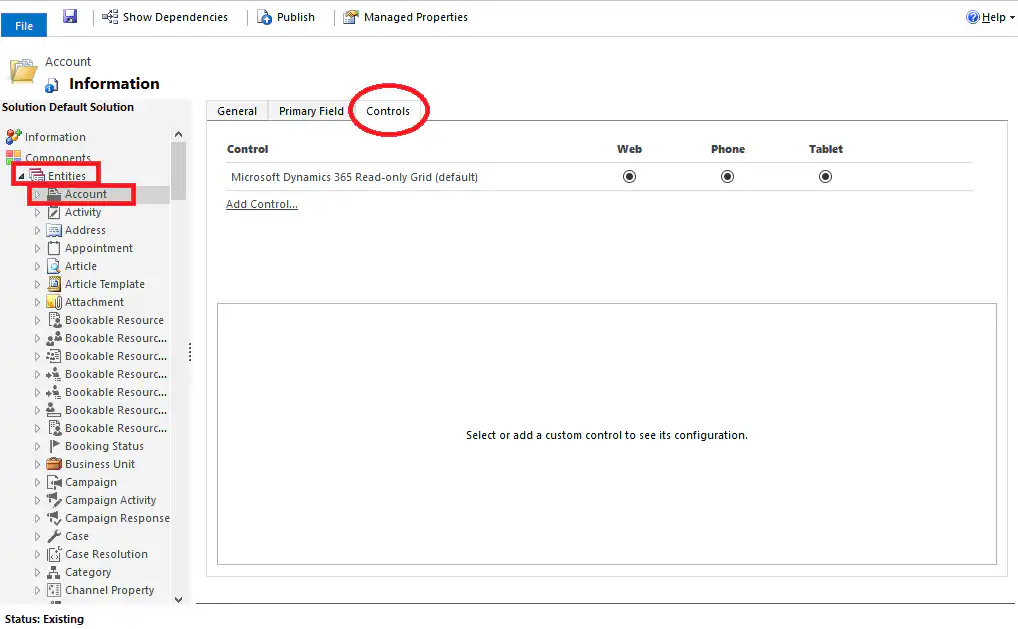
You can see that the ‘Read-Only ’Grid" is enabled by default for web/phone/tablet. This is the Grid as we know it from before.
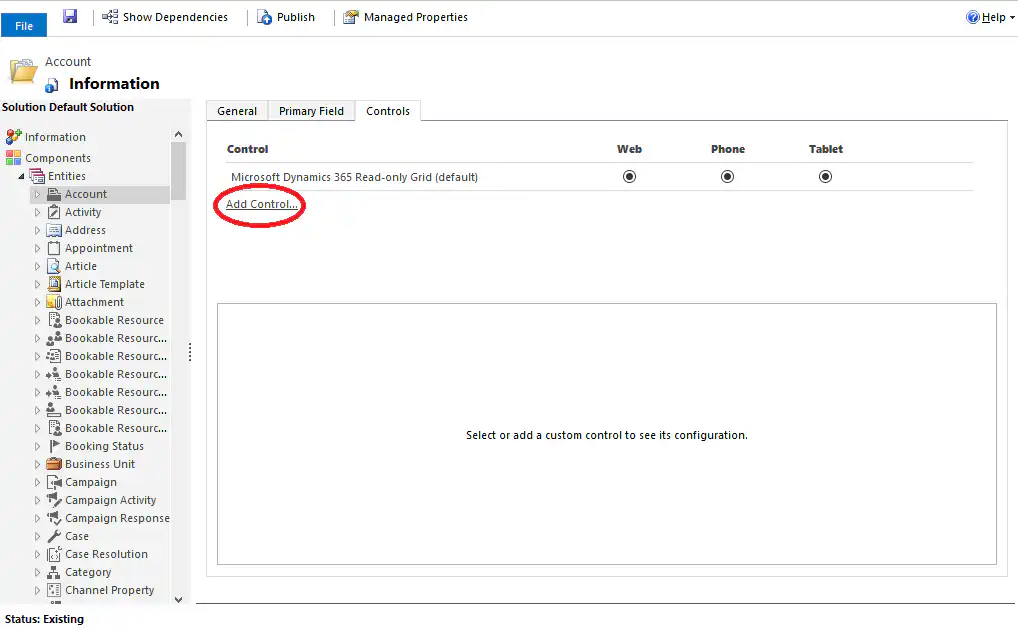
Step 3: To enable the Editable Grid, first click ‘Add Control.’.
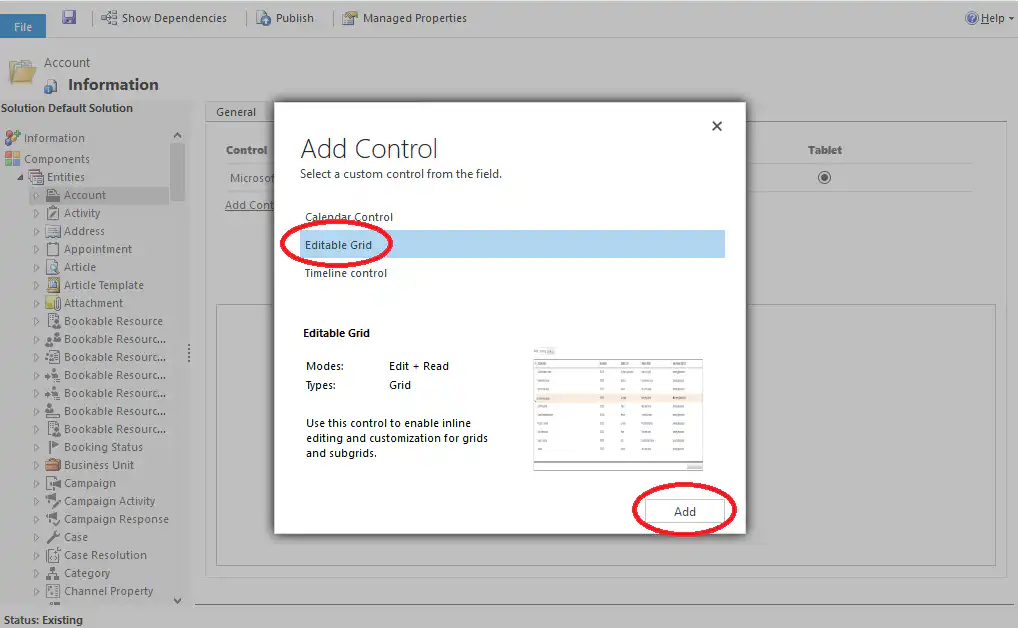
Step 4: Next, select ‘Editable Grid’ –> Click ‘Add.’.
Step 5: Use the radio buttons to choose whether you want to enable the ‘Read-only Grid’ or the ‘Editable Grid’ for web/phone/tablet –> Finally, click the ‘Publish’ button.
2. How do you enable the editable grid for a subview?
A subview is a view of records related to a parent record. This subview is displayed on the form for that parent record. For example, the contacts on an account form.
Step 1: Go to ‘Settings’ –> Navigate to ‘Customizations’ –> Click ‘Customize the System.’.
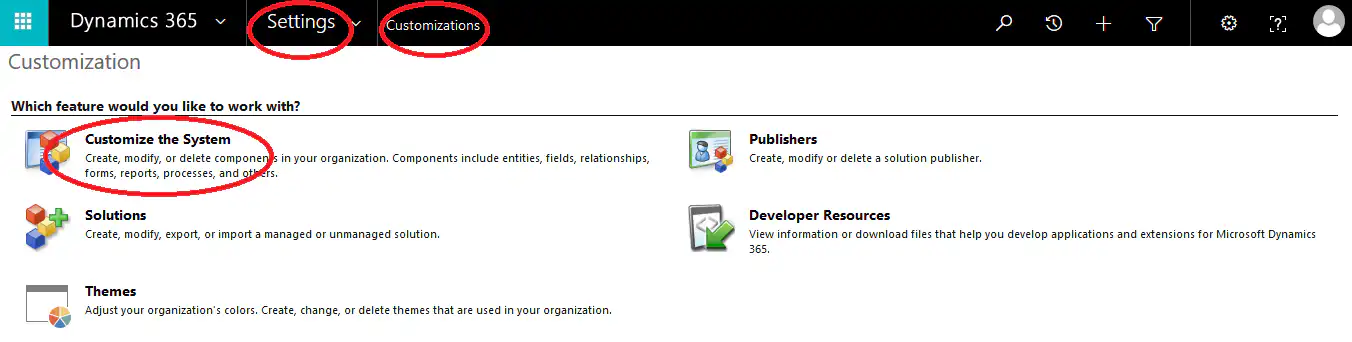
You will then see a new screen.
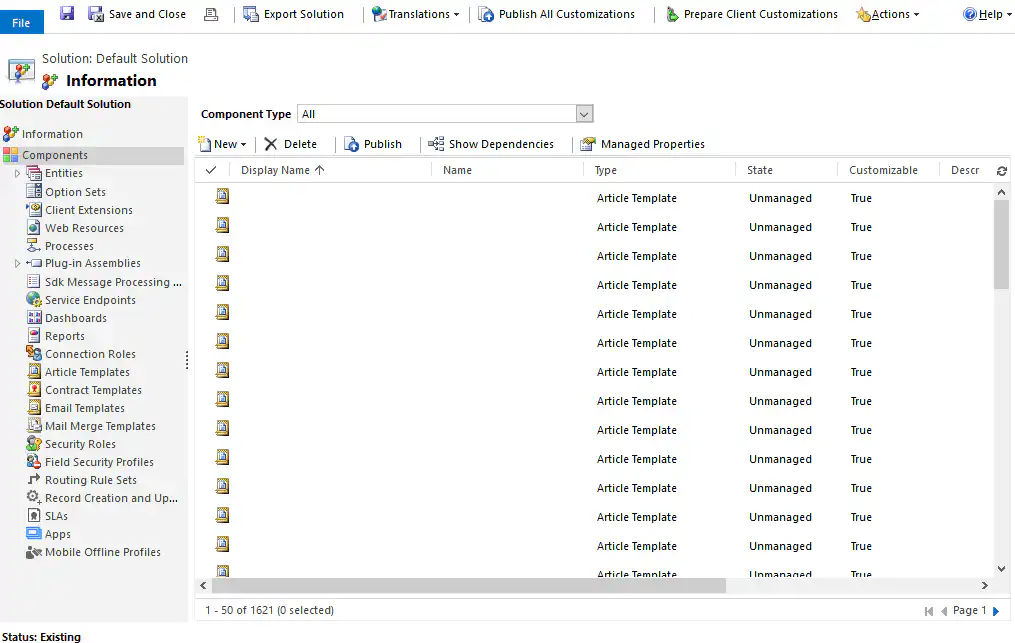
Step 2: On the new screen, go to ‘Entities’ –> Expand the menu under the entity for which you want to enable the ‘Editable Grid’ –> Then click ‘Forms.’.
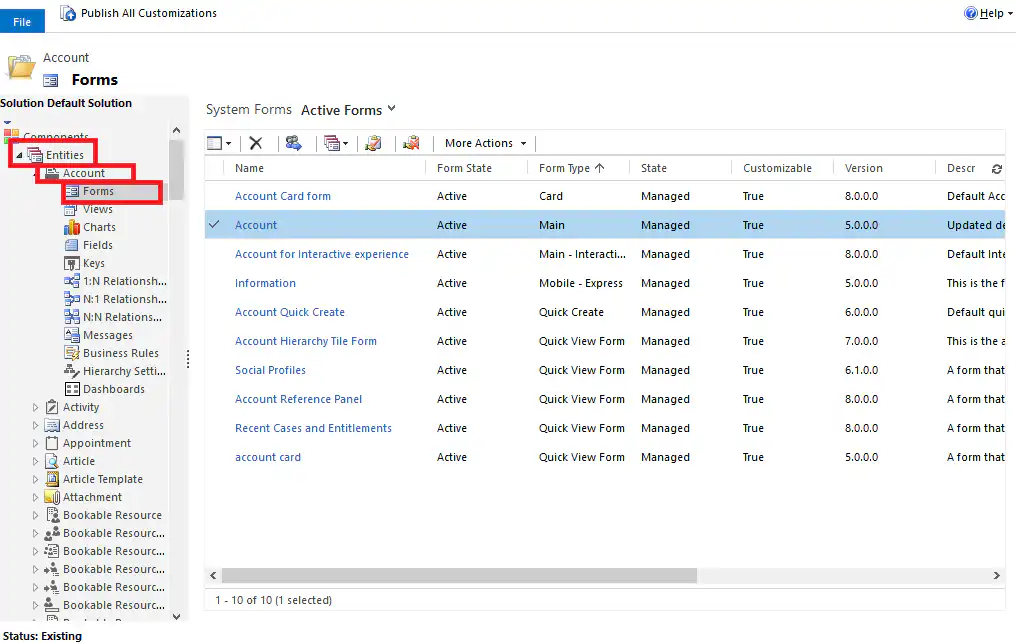
Step 3: Double-click the form on which you want to customize the ‘Editable Grid’ in the subview—for example, ‘Account.’.
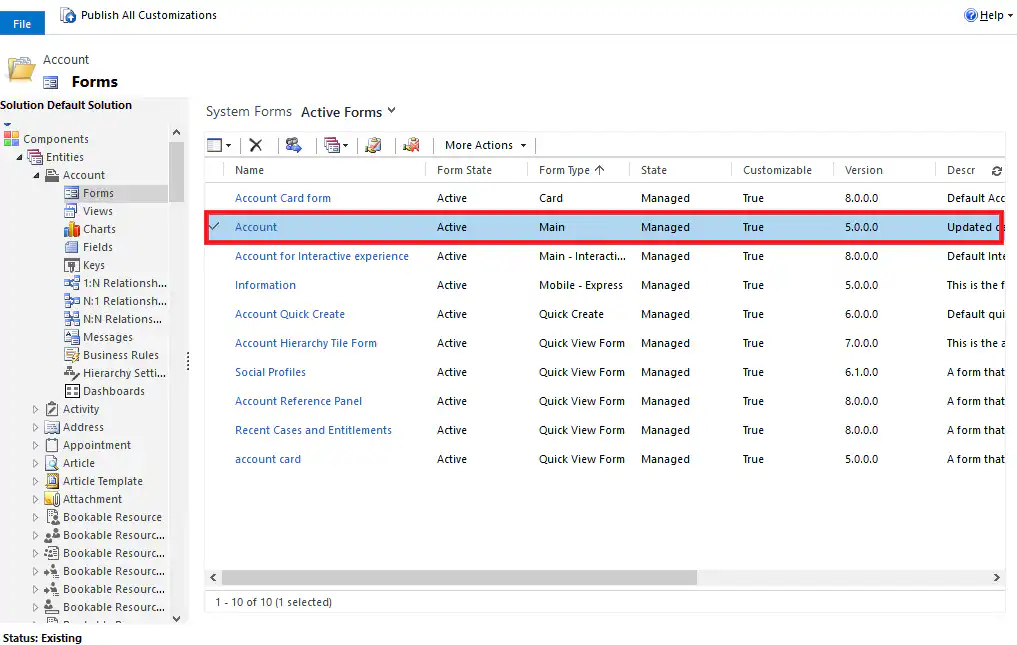
Step 4: On the next screen, select the ‘subview component’ for which you want to enable the Editable Grid, for example, ‘Contacts’ –> Then click ‘Change Properties.’.
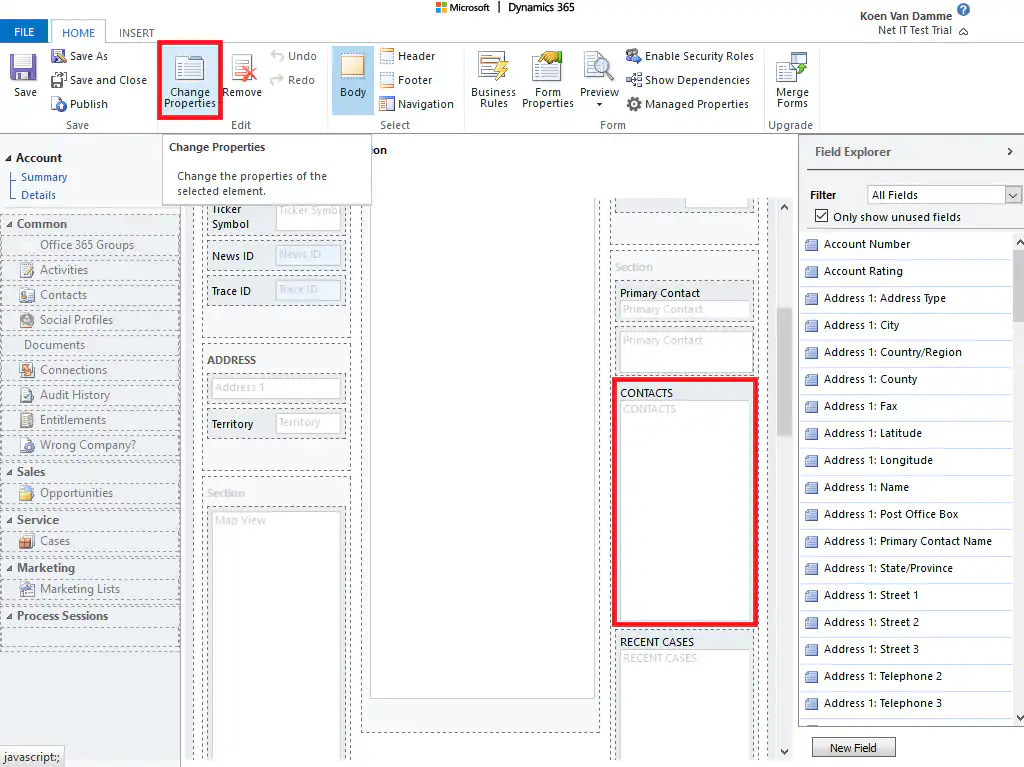
Step 5: You will then see a new ‘Set Properties’ screen –> Go to the ‘Controls’ tab.
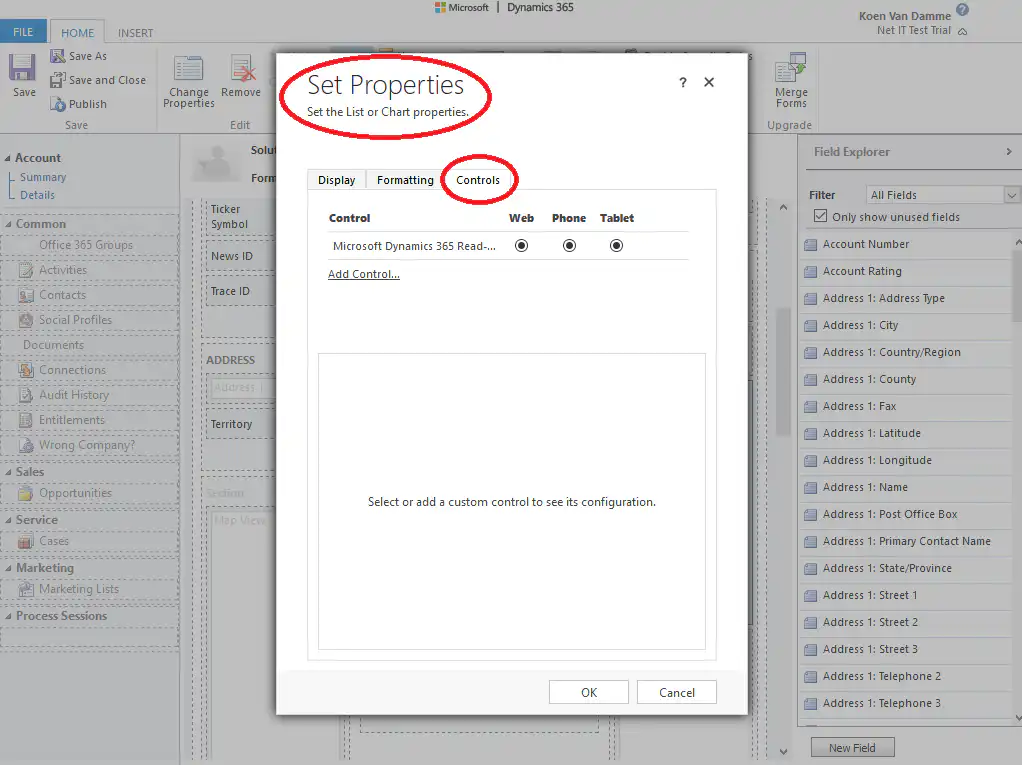
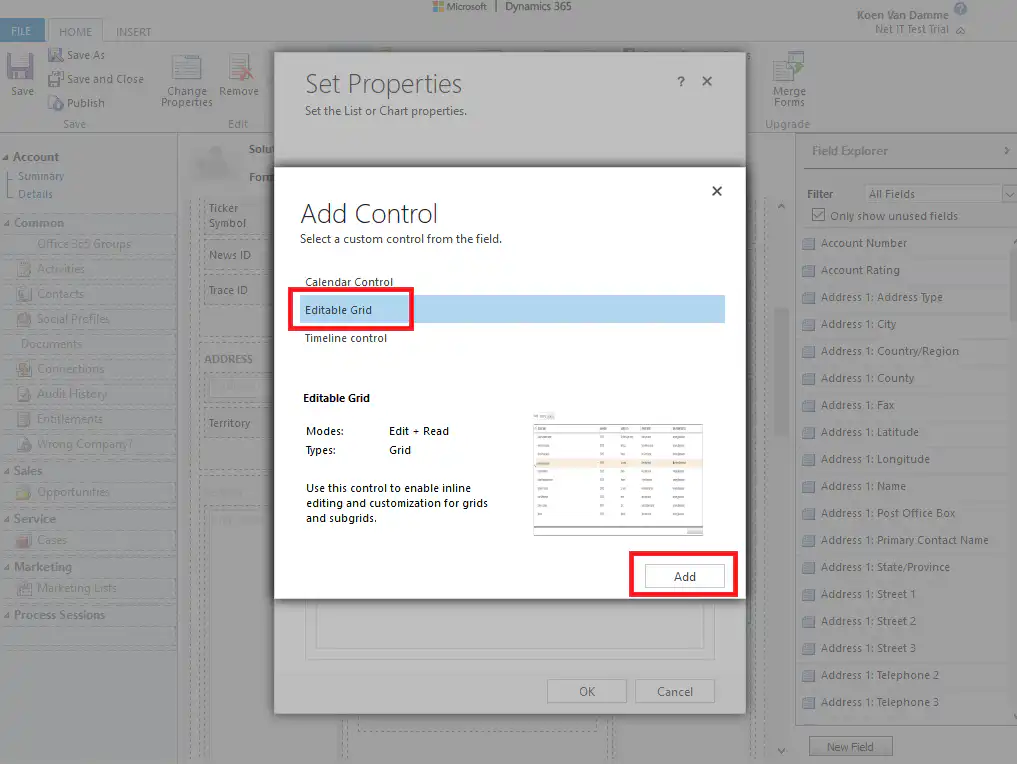
Step 6: Next, enable the Editable Grid feature the same way you did for the general view –> First, click ‘Add Control.’.
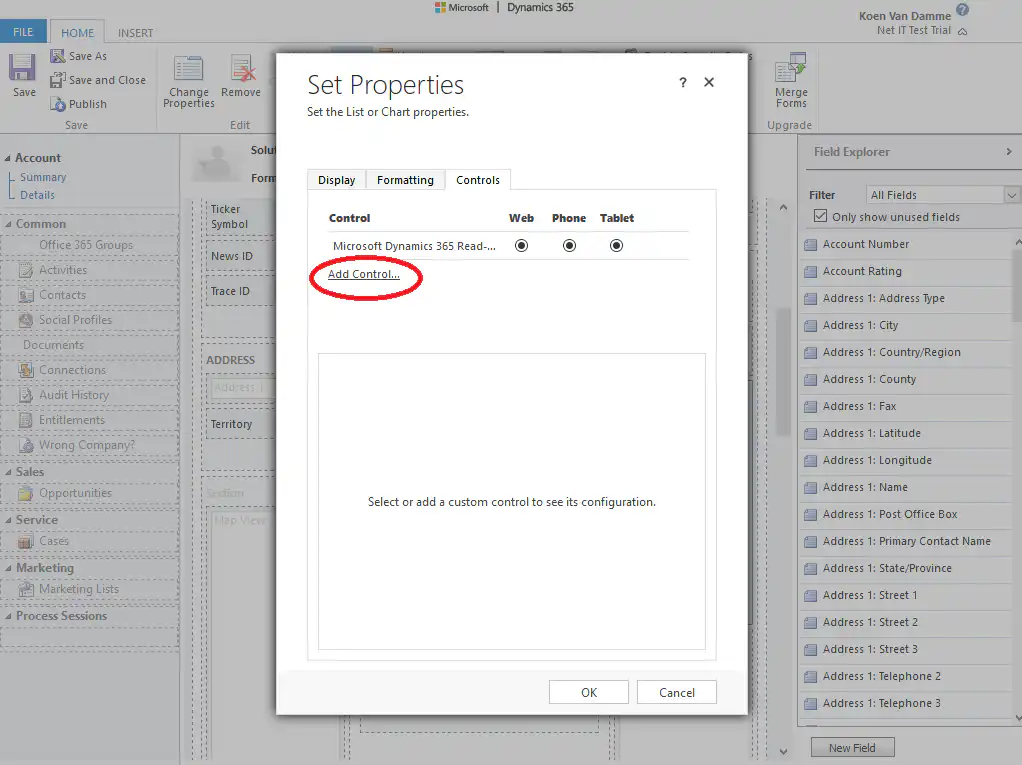
Step 7: Next, select ‘Editable Grid’ –> Click ‘Add.’.
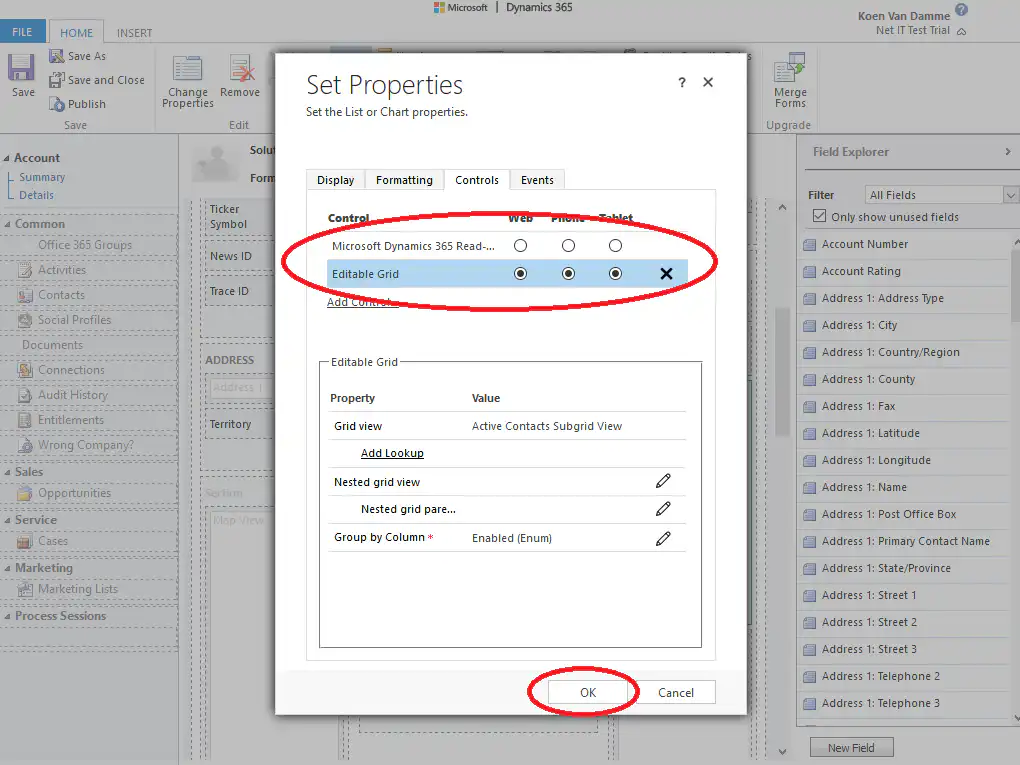
Step 8: Use the radio buttons to choose whether you want to enable the ‘Read-only Grid’ or the ‘Editable Grid’ for web/phone/tablet –> Then click ‘OK.’.
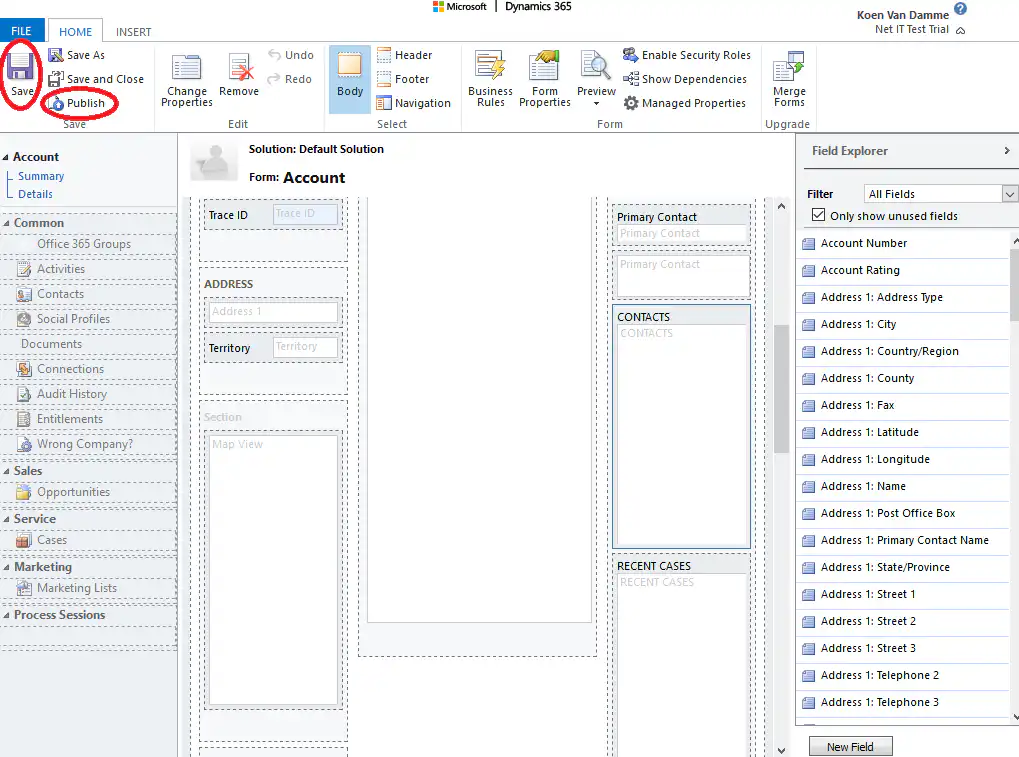
Step 9: Next, save the form –> Then click the ‘Publish’ button to apply the changes.
3. How do you configure the Editable Grid?
Whether you’ve enabled the Editable Grid feature for a main view or a subview, the configuration remains the same. Once you’ve enabled the ‘Editable Grid control,’ the ‘Events’ tab appears. This allows you to configure JavaScript code so that certain actions can be triggered in response to specific changes made to the view.
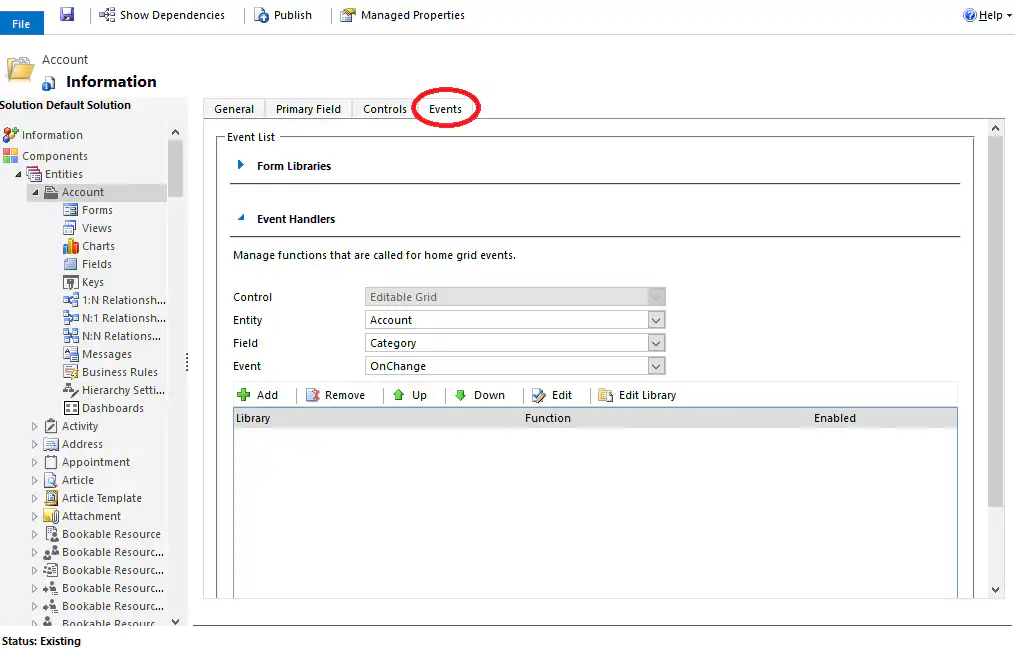
In addition to configuring JavaScript, there are a few other options you can configure. To do this, you must first select the ‘Editable Grid’ row.
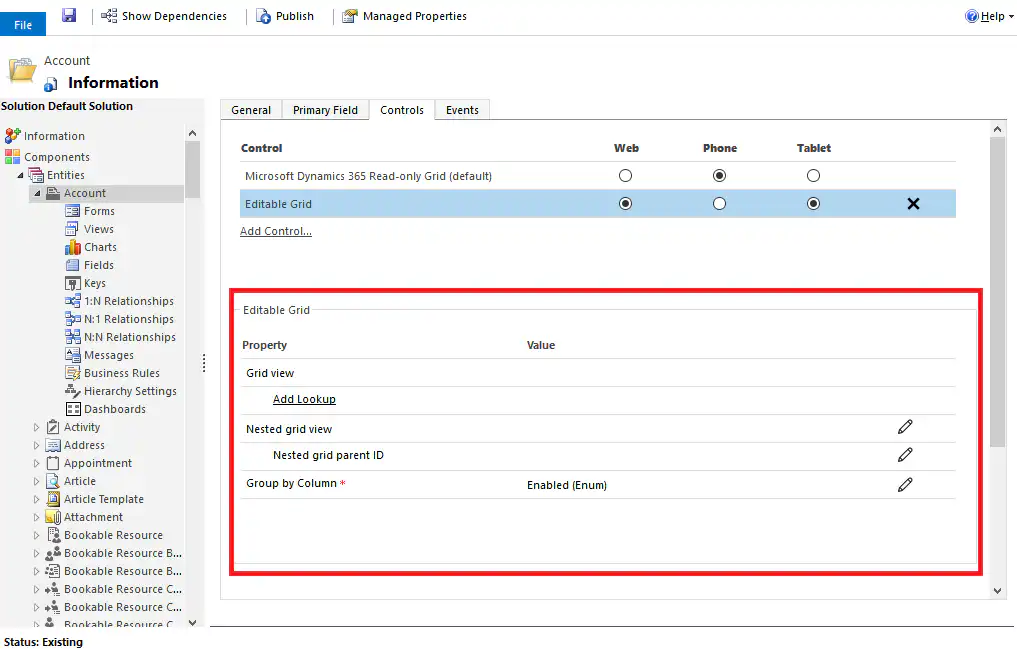
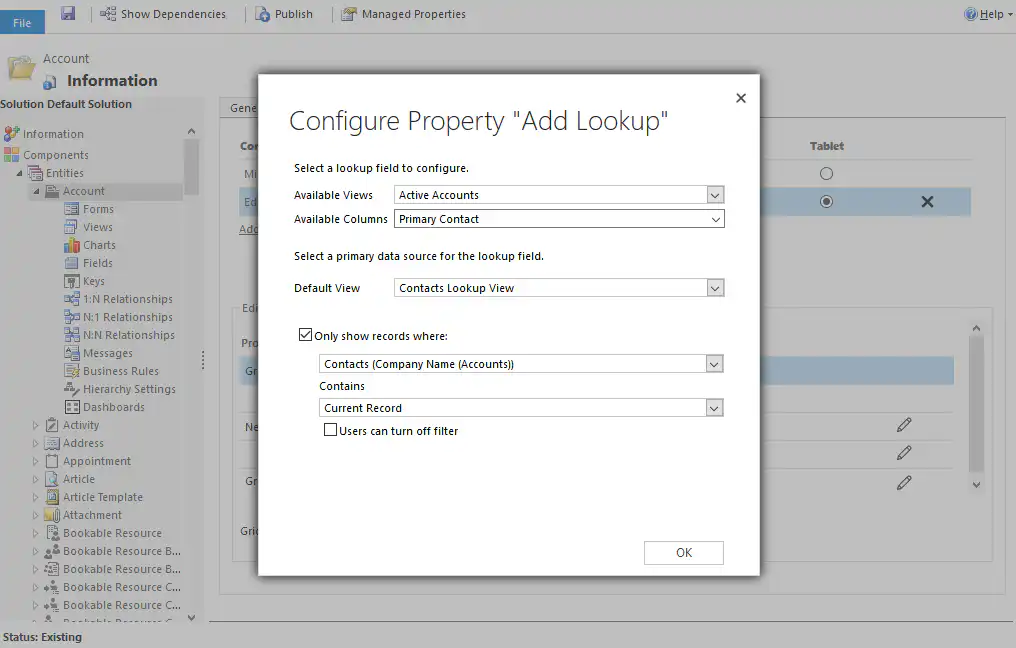
- ‘Add Lookup’: This allows you to configure how a lookup field will function in the view, such as setting up filtered lookup fields for a specific view.
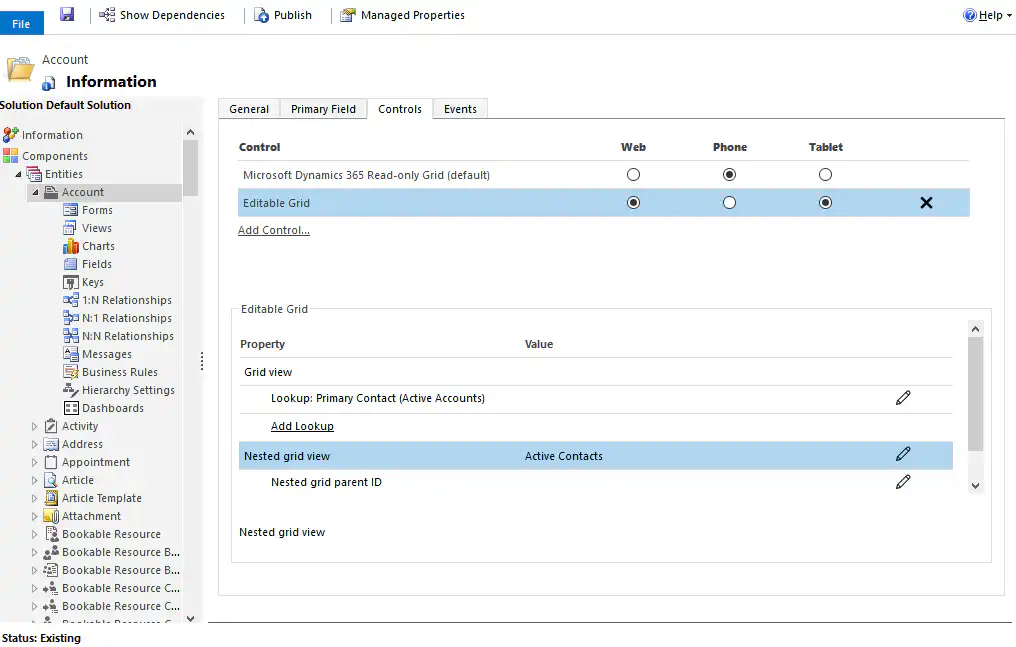
- The ‘Nested Grid View’ and ‘Nested Grid Parent ID’ can be configured to display a view within a view. Please note that this feature is available only on mobile devices.
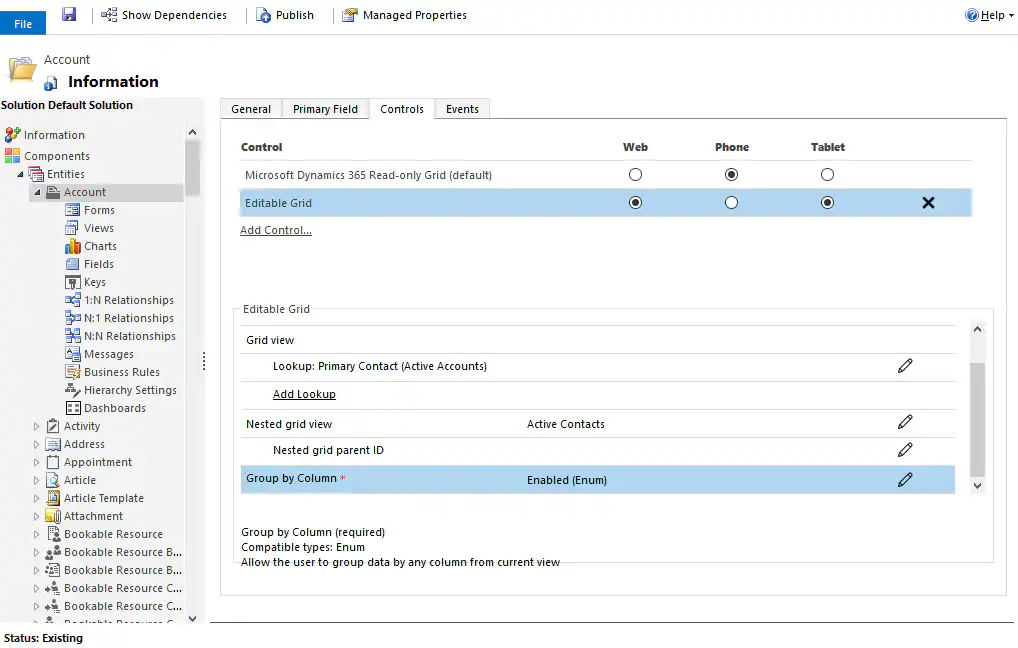
- The ‘Group by Column’ settings: This option allows you to expand and collapse groups of records within a view.
After adjusting the configuration, you'll need to republish. To do this, click the ‘Publish’ button.